There was a time when you needed to have a fresh copy of Windows to install it on a new PC. You’d also need a Windows installation cd to re-install windows but now everything has changed. You don’t need anything other than a USB drive to install Windows 10 now.
With Windows 10 many new features have come but the best one for people who build their own PC or upgrade them on a regular basis is the USB Windows 10 installation, with its help you can install Windows without any hassles.
While the later process of installing Windows 10 is pretty easy, many get stuck on the first part i.e, creating a bootable Windows 10 USB drive. So, today we are going the cover the steps by which you can create a bootable Windows USB drive very easily.
Wait… Before you start creating a bootable Windows 10 USB drive there are a few things you should remember or else you will fail.
Things To Take Care Of Before Starting Windows 10 USB Drive Creation
Here are the minimum requirements you must meet for a smooth creation of Windows installation on a USB –
- You should have a working high-speed internet connection, it is essential for downloading the Windows installation files.
- There must be at least 12GB of storage free on your hard disk or SSD for storing the Windows installation files.
- In case you want to directly download the installation files into your USB memory stick make sure it doesn’t have any data. The Windows Media Creation tool will format the USB before the creation of bootable Windows 10 setup.
- Your USB Drive (or memory stick) should have at least 8GB of space free.
- Check the current Windows 10 specs and see it your PC meet the requirements to run it.
These are some things you must keep in mind else creating a Win10 bootable drive is going to be a nightmare for you. Enough of these, let’s get to the main steps now…
Creating A Windows 10 Bootable USB Drive Using Media Creation Tool

With the help of these steps, you will be able to create a Bootable Win 10 UEFI USB bo0t media. While there are also other ways to do the same we have included the easiest way which works 99% of the time. If it doesn’t work for you, you’re plain unlucky. Just kidding, we will add other methods later.
Download the official Windows 10 Media Creation tool
The first thing to do to create a Windows Bootable USB is the download the Windows 10 Media Creation tool. Now many would think that’s this? In simple words – Win10 Media Creation Tool is a software which allows you to create an installation media or download the ISO od latest version of the Windows 10.
It’s an official tool created by Microsoft for those who want to upgrade their PC or install Windows on a new computer with the help of a USB memory stick or DVD.
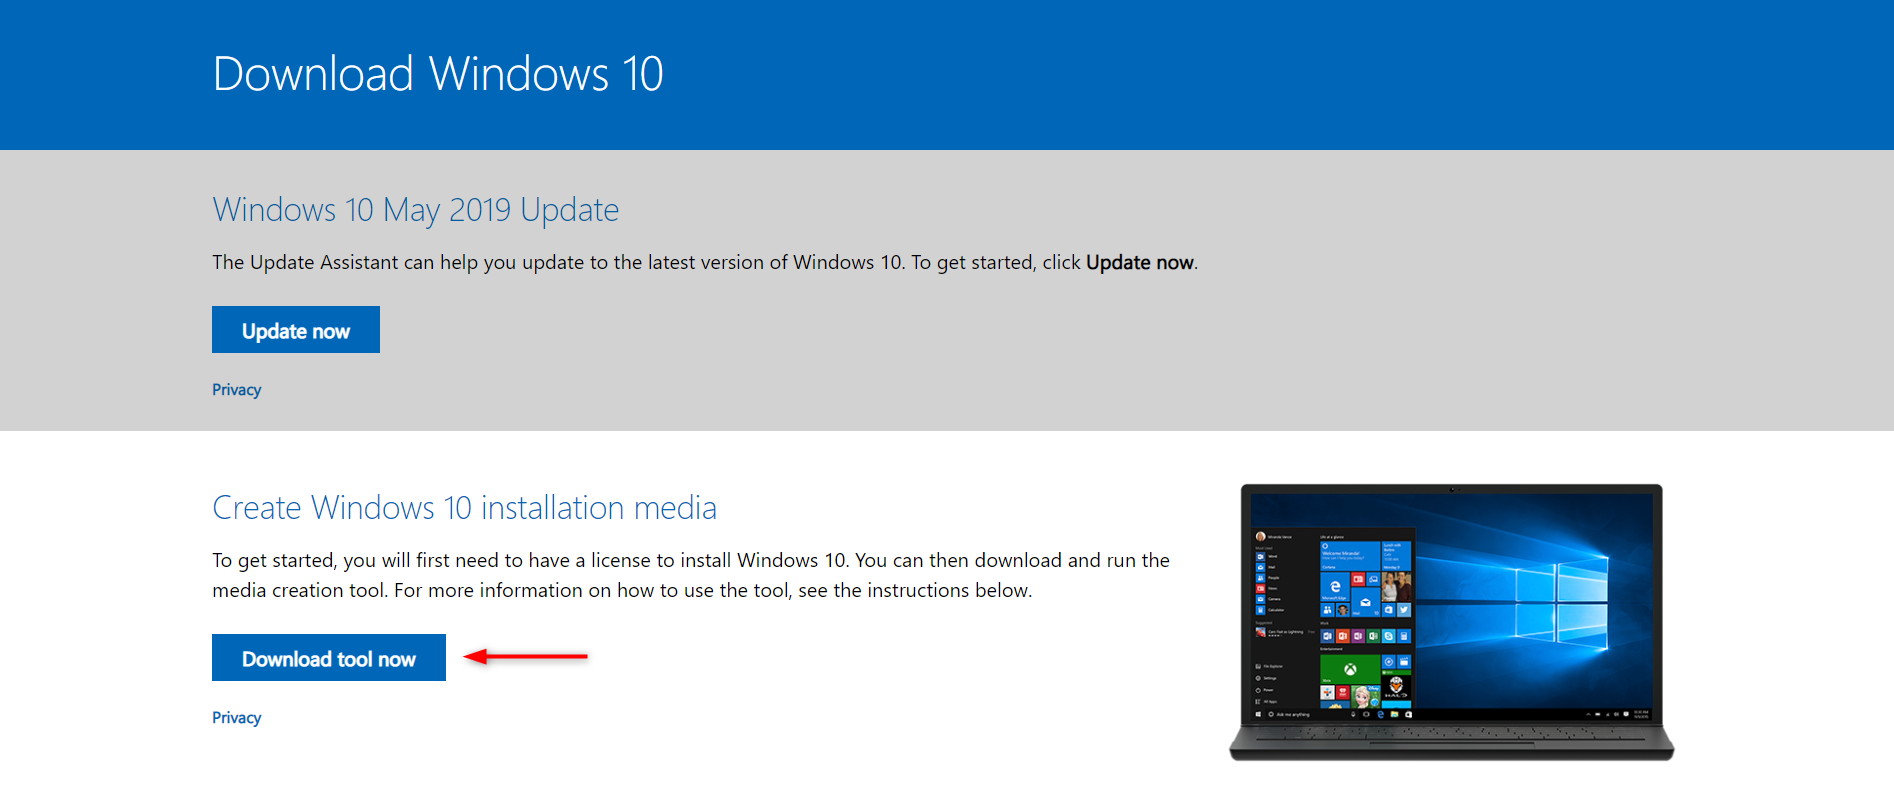
Follow this link to Download Windows 10 Installation Media. Scroll through the page and click on Download tool now. It’s just below the “Create Windows 10 Installation Media” heading.
Save the file to the desired location, it should just take a few seconds to download as its size is 18.33mb. After the download is finished install the tool…
Install The Windows 10 Media Creation Tool
After downloading any file the most logical thing to do next is to run it. That’s what we will be going to do next. Run the “MediaCreationToolxxxx.exe” file. Remember you can run this program only with Admin rights. Use your administrator account to run it if you don’t.
Click on the file icon and select -> Run as admin. After that, on the screen, it will ask you if you’re sure or not to run this app. Click on Yes!

Then the Media Creation Tool will ask you to read the terms and conditions (which you will skip anyway). Scroll to the end and click on Accept!
Plug-In USB Drive (Offcourse)
We aren’t joking, make sure you have inserted your USB memory stick to create a bootable Flash drive. You should use a USB which has 8GB Space free, a Kingston (or any) 8GB Pendrive will get the work done.
Also, check it for any important files cause once you start creating a bootable drive any data you have on it will be gone forever. You wouldn’t like that if it has some very important files. Would you?
Create Installation Media
Now we’re getting to the most important part. The Media Creation Tool just takes a few seconds to get everything ready. After that you have to choose from two options – Upgrade your PC or Create Installation Media.
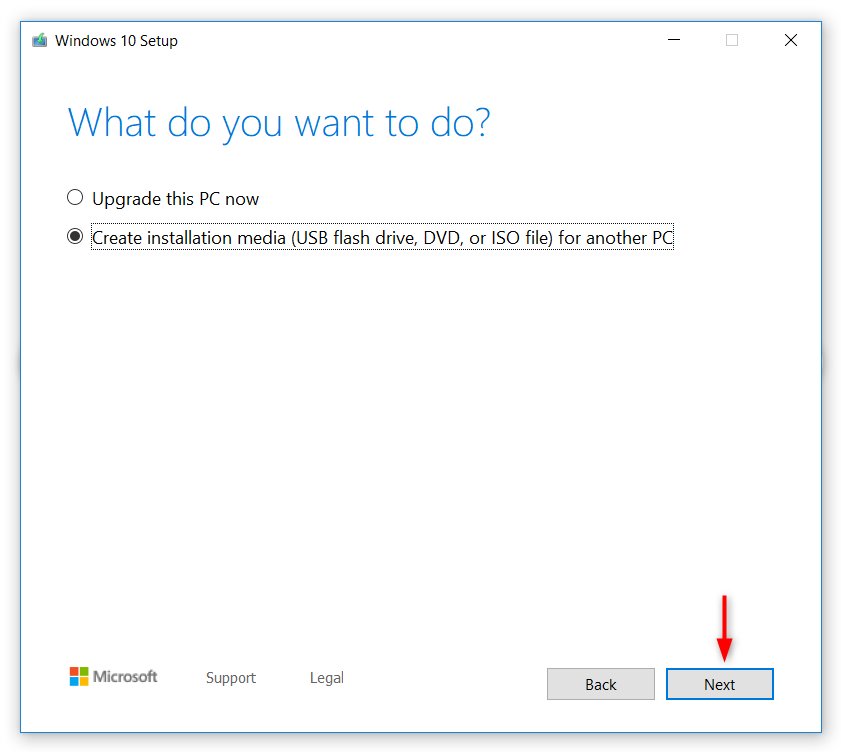
We’re here to install Windows 10 on other devices so we will go with the “Create Installation Media” option.
Next, you will have to select the Language, Edition & Architecture that you want to use for your Windows 10 Installation Media. You can select the language of your choice but it should be English (as it’s the best choice), Edition is the version of Windows which should be 10, and the Architecture can be 32 or 64 bit. We recommend it to be 64-bit.
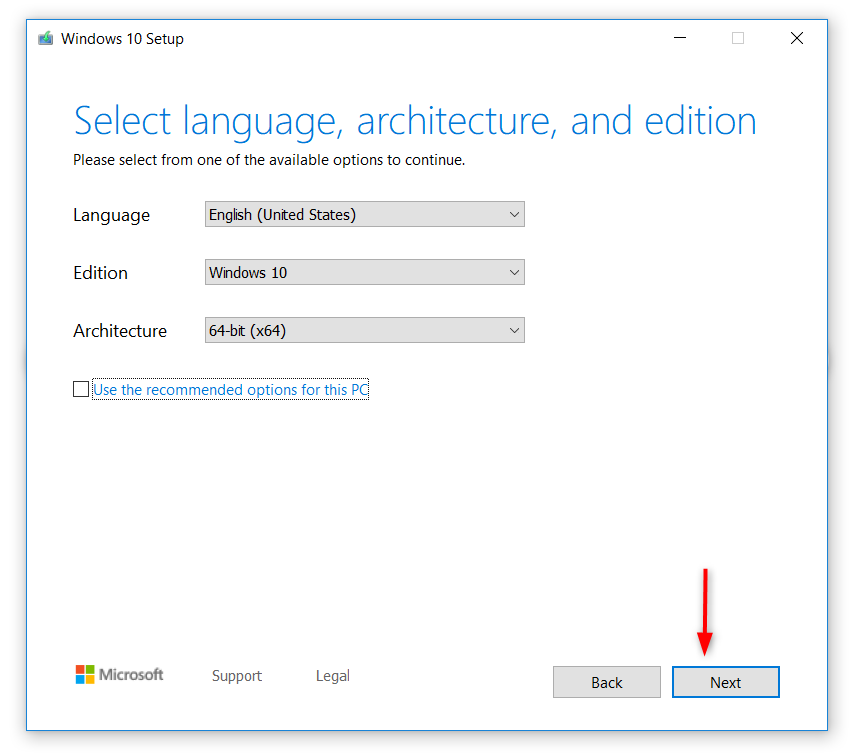
Once you have confirmed the language, edition, and architecture, click on -> Next!
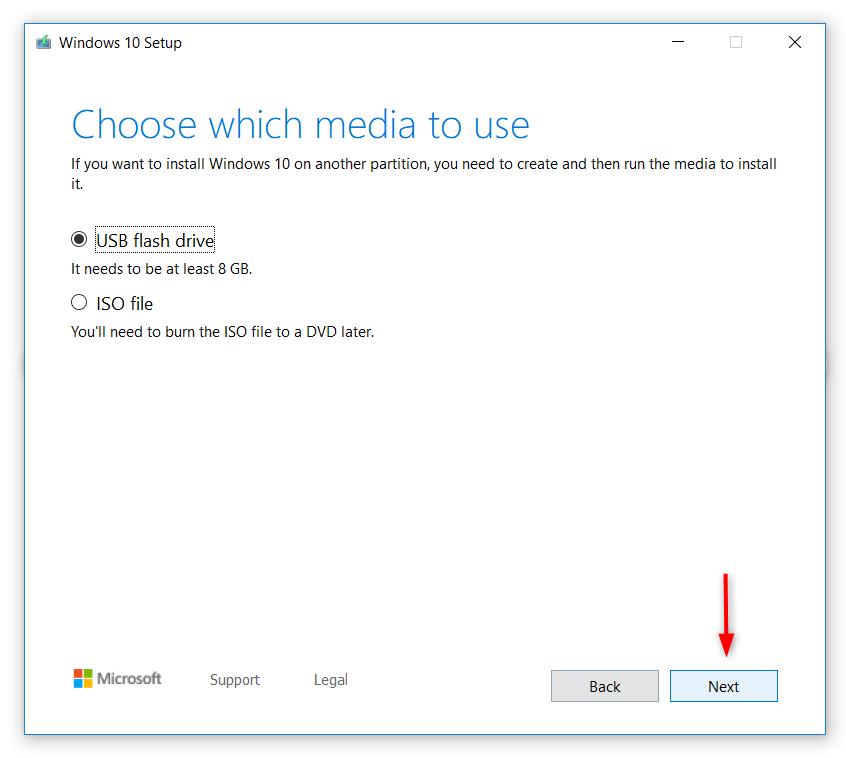
After that, you will have to select which type of media you want to use. There are two options – USB Flash Drive and ISO Image. We want to create a bootable USB drive so we will select “USB Flash Drive” and click on Next.
When you select the USB Flash drive, after that, you will see all the drives whether internal or external present here. You will need to select the one on which you want to have the Windows installation media. You will see your USB drive on the removable drive list. Make sure to copy the important files before proceeding so you don’t regret deleting them in the future.
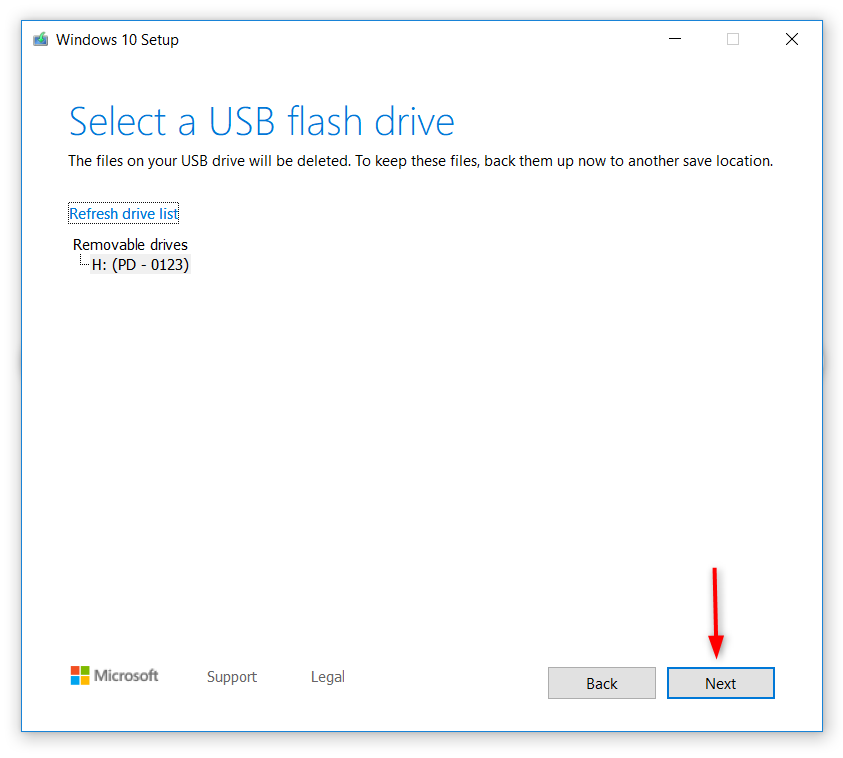
If you are not able to see your removable drive click on -> Refresh drive list. Then just click on -> Next and you are good to go the last step…
Download Windows 10
So, you’ve made it to the last step, after finishing this step you’ll have your Windows 10 ready. This is the easiest step, you just have to click a few buttons and hope your internet connection doesn’t betray you.
After choosing the USB Flash drive, the Media installation tool starts downloading the latest Windows 10 into your device. The download process depends on your internet speed if you have a decent internet connection say 1-2mbps it will be done in 20 minutes approx.
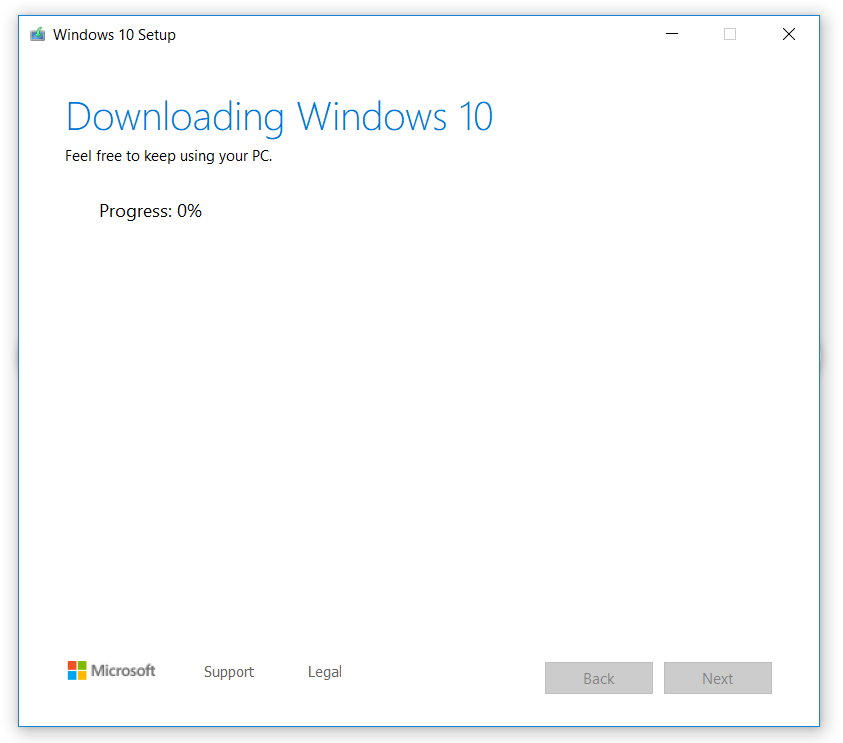
You will need a lot of patience if your internet speed isn’t high. But wait, it’s worth it. (See we’re good at motivating people.)
When the download is completed it will take a few minutes to verify that everything’s working fine. It just takes 4-5 minutes for this process to complete.
Finally, when the download is complete you will see the message “Your USB Flash Drive is ready”. Click -> Finish. Now you can use this USB drive to boot and install Windows 10 on another PC.
This the best and by far the easiest method you can use to create bootable Windows 10 USB drive. You will have both Unified Extensible Firmware Interface (UEFI) and Legacy Basic Input/Output System (BIOS) support on this Bootable drive.
Final Thoughts…
You see, these were the only few steps that you need to follow in order to create a bootable Windows 10 USB drive. These steps are super easy and if you have a good internet connection completing it will only take half an hour at maximum. You just need to follow these steps correctly.
Related: How To Fix KMode Exception Not Handled Error [Easy Guide]
We hope that you liked the article and created a working Windows 10 bootable USB drive for installing a new version of Windows on your PC or Laptop. Share the article if it helped you and keep coming back for more. Cheers!
