
Windows 10 is undoubtedly the best Windows Microsoft has released in a long time. There are many things great about this OS like – it supports modern hardware, have some amazing features, it’s much secure, etc. They have also added many system processes to make your experience better.
But sometimes these system processes which were added with a good intention become the cause of problems. Talk about creating your own problems, software companies are great at this. One of the system processes which was added to make the experience better but sometimes causes problems is – Service Host SuperFetch.
Many people face high disk usage due to SuperFetch, it also makes the PC feel sluggish. If you are a Windows user, you would have faced the 100% disk usage warning, it is because of “Service Host SuperFetch” takes way too much memory in the task manager.
If you have ever faced this issue (or are facing it right now) then here we have covered everything you need to learn. After completing the article you will be able to get rid of this issue easily…
What is Service Host SuparFetch? – Windows 10

SuperFetch feature was first available for Windows Vista, it came after the PreFetch feature of Windows XP. The use of this system process is to find out and analyze what programs your system runs. Basically, it generates a list of programs you run most often and load their data even before you open the app.
It helps to open your favorite apps by pre-loading their data into your RAM instead of the hard drive because fetching data from RAM is faster when compared to fetching data from the hard drive. It’s because of this service you can open most of the apps in milliseconds (faster than a Snap).
The three main things that SuperFetch does is – It decreases your boot time i.e, your PC will start faster, Loads most of the commonly used apps fast and it learns which apps you use the most. It is a good system process but the trouble begins when it starts taking too much disk space.
100% disk usage & Windows Service Host SuparFetch
You would be thinking that if it so much helpful why in the world does it take so much of the memory? Well, that’s the thing with Windows each system works and doesn’t work perfectly at the same time. Like other Windows features, it will causally go wild and then get fixed on its own.
However, sometimes you will need to put in some work if you want to get rid of this issue easily. We will talk about some ways by which you can disable the SuperFetch feature later. (You can skip to the methods if you want.)
100% disk usage issue sometimes happens because Service Host SuperFetch is always running it the background no matter what you do. It uses system resources like RAM and CPU usage to work properly.
If you have a low-end PC then you will face this issue more frequently. Worst case scenario – your system will crash if it’s on the lower side. Especially when you are playing games or running resource hungry apps like Google Chrome (really?).
This gives rise to a question – Do you really need this feature? Is this service so important? Should I disable it? Won’t it cause any problems? These are many questions but we have to answers. Don’t worry…
Do you really need SuperFetch in Windows 10?
Well, the answer is No! You really don’t need to use (or have) the SuperFetch feature on your computer. The only downside you will have are – your apps will take a little more time to load, booting time will increase a little. Else, there won’t be many changes.
Will disabling SuperFetch cause any errors?
Again, NO!
While after disabling it you may feel like your computer is a bit slow, you will get rid of the 100% disk usage caused by “Service Host SuperFetch”. You won’t face any errors after you disable it as it’s only a memory management tool which makes the computer a little faster.
If you use an “SSD” in case of a hard disk drive “HDD” you won’t even notice the difference. People who have SSD don’t even need this service. It’s no secret that SSDs are way faster than HDDs. If you don’t have an SSD you should invest in getting one.
3 Easy Methods To Disable Service Host SuperFetch

Here are the three methods that you can use to disable the SuperFetch feature –
Disable Service Host SuperFetch From Command Prompt
No matter what your issue is, using Cmd is the best method to get rid of anything on your computer. For removing this issue follow these steps –
- First of all, go to the windows search bar and enter “Cmd”.
- Then do a right-click with your mouse and select “Run as Administrator”.
- Now, you will have to enter this command -> “net.exe stop superfetch”, press Enter key.
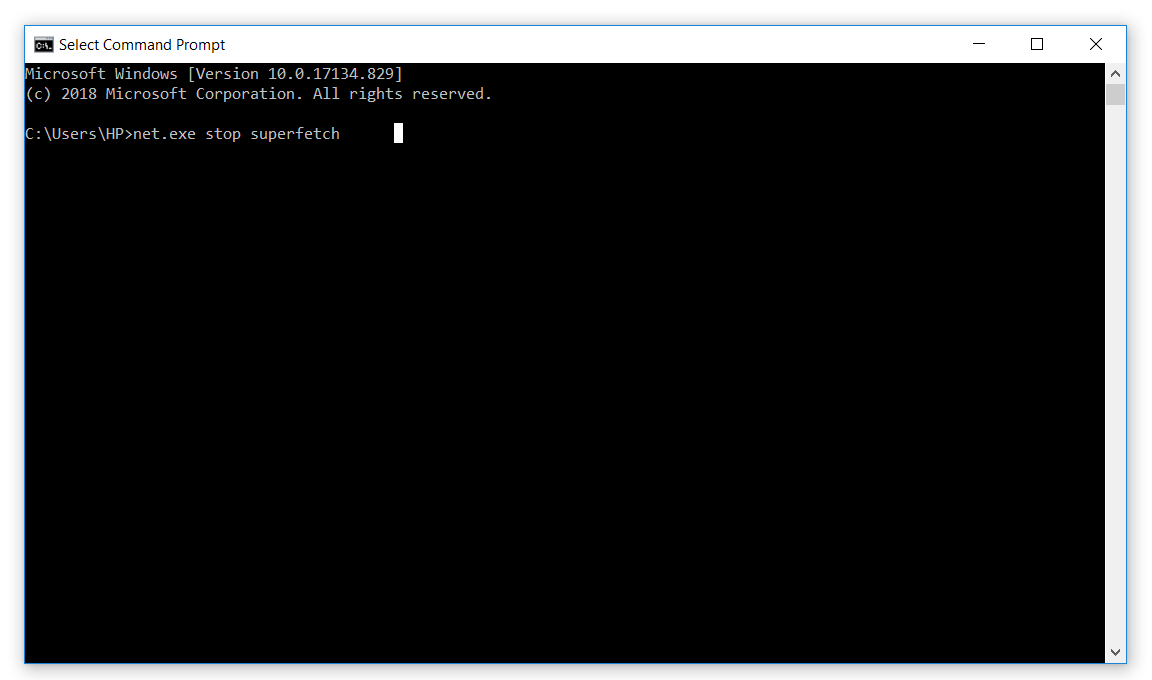
- After this, enter “sc config sys main start = disabled”. Again press the Enter key.

Restart your computer, you won’t see this program running ever again. That’s why we say, Command Prompt is the solution of almost every software problem. It makes everything easier.
Disable Service Host SuperFetch From Registry Editor
Another very easy method to disable SuperFetch feature using the Registry Editor, here are the steps you have to follow –
- Go to Windows 10 search bar and enter “Regedit”.

- Open the program.
- Type this address on the search bar of Registry Editor -> “HKEY_LOCAL_MACHINE / SYSTEM / CurrentControlSet / Control / Session Manager / MemoryManagement / PrefetchParameters”
- You will see “Enable SuperFetch” on the results at the right side, open it by double clicking.
- Change the values. You have to insert the value “0” in place of “1”. Then click OK.
- Close the Window and restart your computer. The issue will be gone.
Disable Service Host SuperFetch By Using Services Snap-In
If you find the above-mentioned methods easy then this one’s the easiest. Here are the steps –
- Open your PC (obviously), go to Windows search bar and type “Services.msc”. Run it as admin.
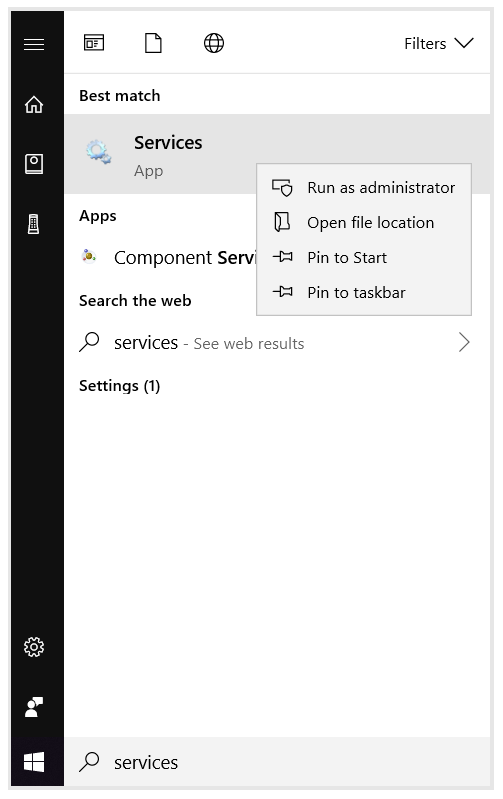
- Search until you find the “SuperFetch” feature on the list.

- When you find it, right-click and choose “Stop”. This will stop the service.
- To stop it permanently, right-click on the option again and select “Properties”.
- On the drop-down menu of “Startup Type” select “Disable”. That’s all.
You can choose any method you like, all of the 3 methods work 100%. We never got this error still we decided to stop the service by these methods to check them out and guess what? They work!
Conclusion…
So, we tried to cover everything about the SuperFetch feature. If you have read the article you would now know to disable this service and get free disk space on your computer. By following the above methods you would be able to solve this “Service Host Superfetch” 100% disk usage issue easily.
Related: How To Fix KMode Exception Not Handled Error [Easy Guide]
See you don’t need to be an expert to solve these kinds of issue. If you’re a total beginner you can read about them and find their fixes easily. On our blog, we cover everything related to tech, you can read to become an expert. Everyone was a beginner and we learn slowly. (Why Am I writing this?)
Anyways, thanks for reading the article until the end. Share the article with your friends and put your thoughts in the comments below. Cheers!